
Last updated on May 11th, 2023 at 11:05 am
E-invoice on GePP Portal
Introduction
“GST e-Invoice Preparing and Printing” i.e. GePP is an online web application developed by NIC for the generation of IRN and printing of e-Invoice. There is a seamless integration of the GePP portal with the e-invoice portal, so the IRN can be generated instantly by entering the details of tax invoices on the GePP portal.
Generating IRN through the GePP portal is quick and easy. It should be used by the taxpayers who are required to generate a few e-Invoices. Taxpayers using the GePP portal will not be required to integrate their accounting software with the e-invoice portal or use the Bulk upload option on the e-invoice portal.
- Use the same username and password used on the e-invoice portal and e-way bill portal.
- E-way bill can be generated by entering the details of Part B along with generating an e-invoice on the GePP portal.
- IRN can be generated using the web as well as the mobile application of the GePP Portal.
Steps to generate an e-Invoice using GePP Portal
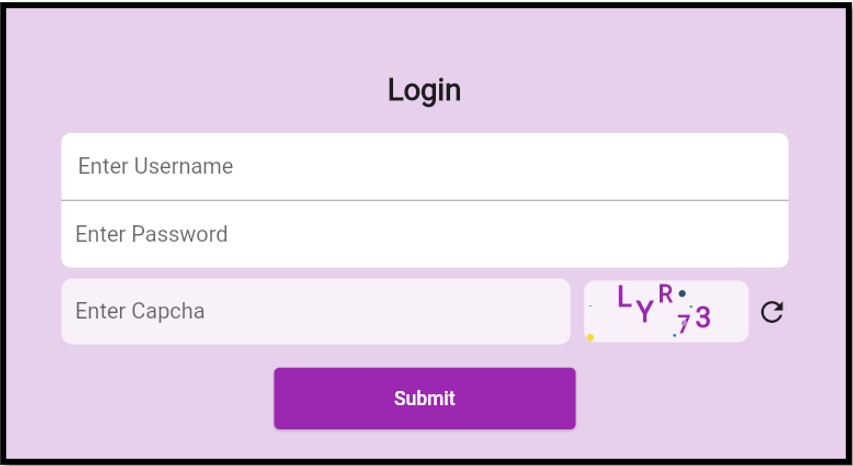
Step 1 – Go to GePP Portal – https://gepp.einvoice1.gst.gov.in/#
Step 2 – Login with username & password and enter the captcha code.
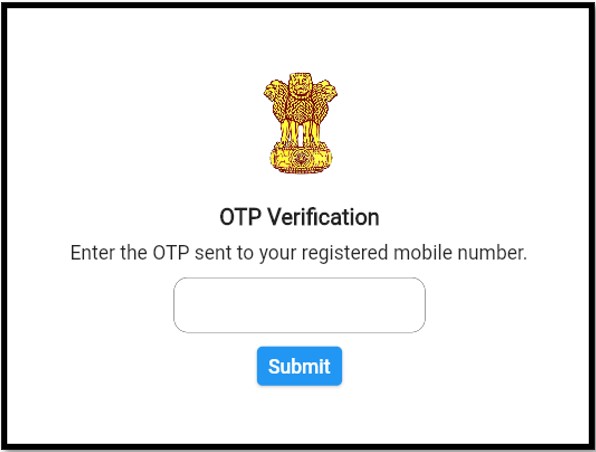
Step 3 – Enter OTP sent to the registered mobile number. [Note: OTP will not be sent to the registered email address]
Step 4 – A new window will open which will display the following non-editable details
- GSTIN
- Legal Name
- Trade Name
- Logo
- Address
- Location
- Pincode
Verify all the details if there is any error in the displayed details do not generate IRN and click on “DONE”. Raise a grievance on the GST portal.
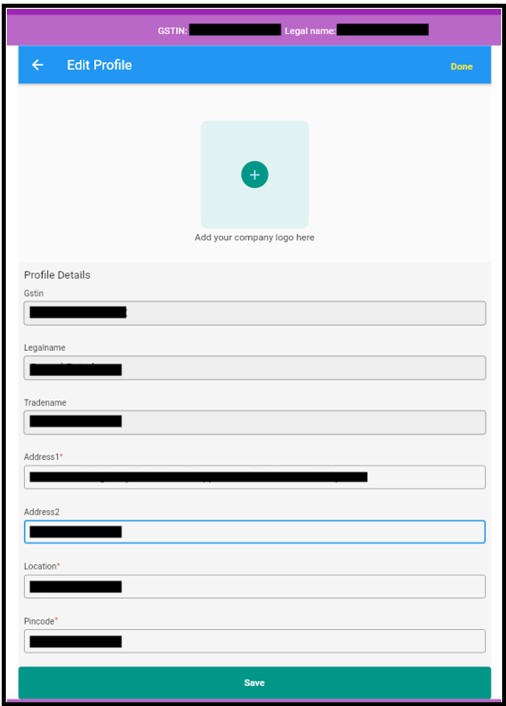
Note: Logo will not be displayed on IRN even if the logo of the company is added. Only the Address 2 field is editable.
Step 5 – Another window displaying pending invoices, generated invoices, recipients, and products shall be available. On the right-hand corner click on the option “Create Invoice“.
- Generated invoices are available only for 24 hours on the GePP portal after that they will be visible on the e-Invoice Portal.
- Pending invoices will be the saved invoices before they are generated.

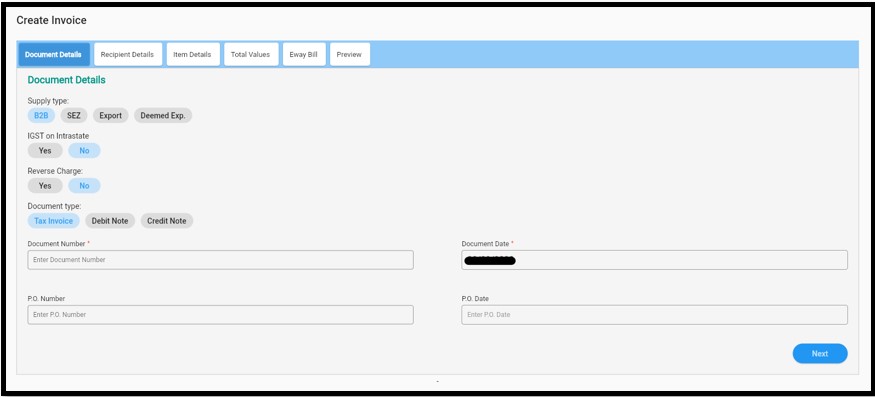
Step 6 – Provide the details of the document in the 1st tab of the create invoice – “Document Details”. And then click on next to go on 2nd tab.
- Select the type of supply – B2B/SEZ/Export/Deemed Export
- Whether supply attracts IGST on Intrastate – Yes/No
- Whether supply attracts RCM – Yes/ No
- Select the type of document – Tax invoice/Debit note/Credit note
- Enter the Document number and document date.
- You can also provide details of the purchase order number and date.
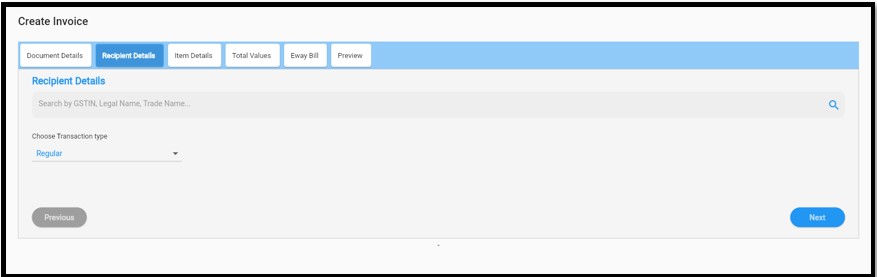
Step 7 – Provide the details of the recipient in the 2nd tab of the create invoice – ” Recipient Details”.
- You have to add the recipient by entering the GSTIN in the space provided. Once you enter the GSTIN details of the recipient will be displayed you need to verify the details like GSTIN, legal name, trade name, location, address, state, pin code, place of supply, phone, and email. If the details are correct click on “SAVE” in Add Recipient.
- Then you have to select the transaction type
- Regular
- Bill to Ship to
- Bill to Dispatch to
- Combination of 2 and 3
- Then choose the place of supply from the drop-down list of states.
If you select “Bill to Ship to” you have to provide the following “Ship to details” – GSTIN, legal name, trade name, location, address, state, and pin code.
If you select “Bill to Dispatch to” you have to provide the following “Dispatch details” – Name, address, location, state, and pin code.

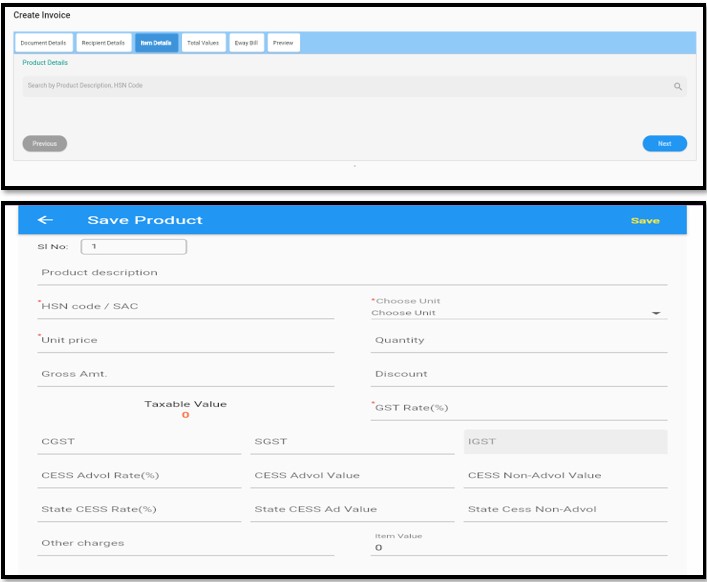
Step 8 – Provide the details of the product in the 3rd tab of the create invoice – ” Item Details”.
- You have to add the product details by entering the HSN/SAC code in the space provided.
- The following details of the product i.e. product description, HSN, unit, unit price, quantity, gross amount, discount, GST rate, cess non-advol rate or value are to be provided. Then click on “SAVE” to add the product.
- Then “added product” will be displayed. If you have multiple products in one tax invoice multiple products and details are to be added. Click on Next to go to the next step.
Step 9 – Details of the total of all items shall be displayed in the 4th tab of the create invoice – ” Total Values”.
- One must verify the taxable value, applicable GST, and total invoice value. And click on “Next”.

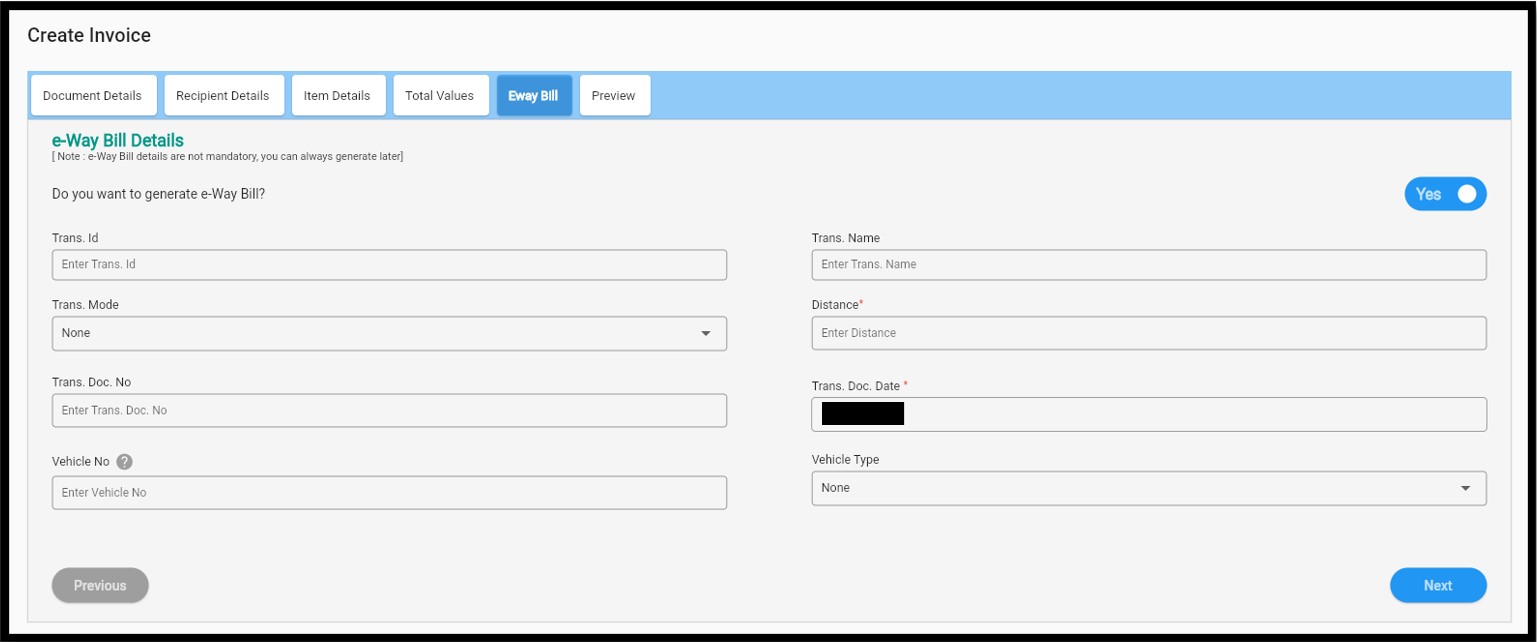
Step 10 – Details of e way bill can be added in the 5th tab of the create invoice – ” Eway Bill”.
If you wish to generate an e-way bill along with the generation of an e-invoice you can slide “Yes” and provide the details of distance, transporter ID, name, mode, etc. Alternatively, an e-way bill can be issued later through e way bill portal too.
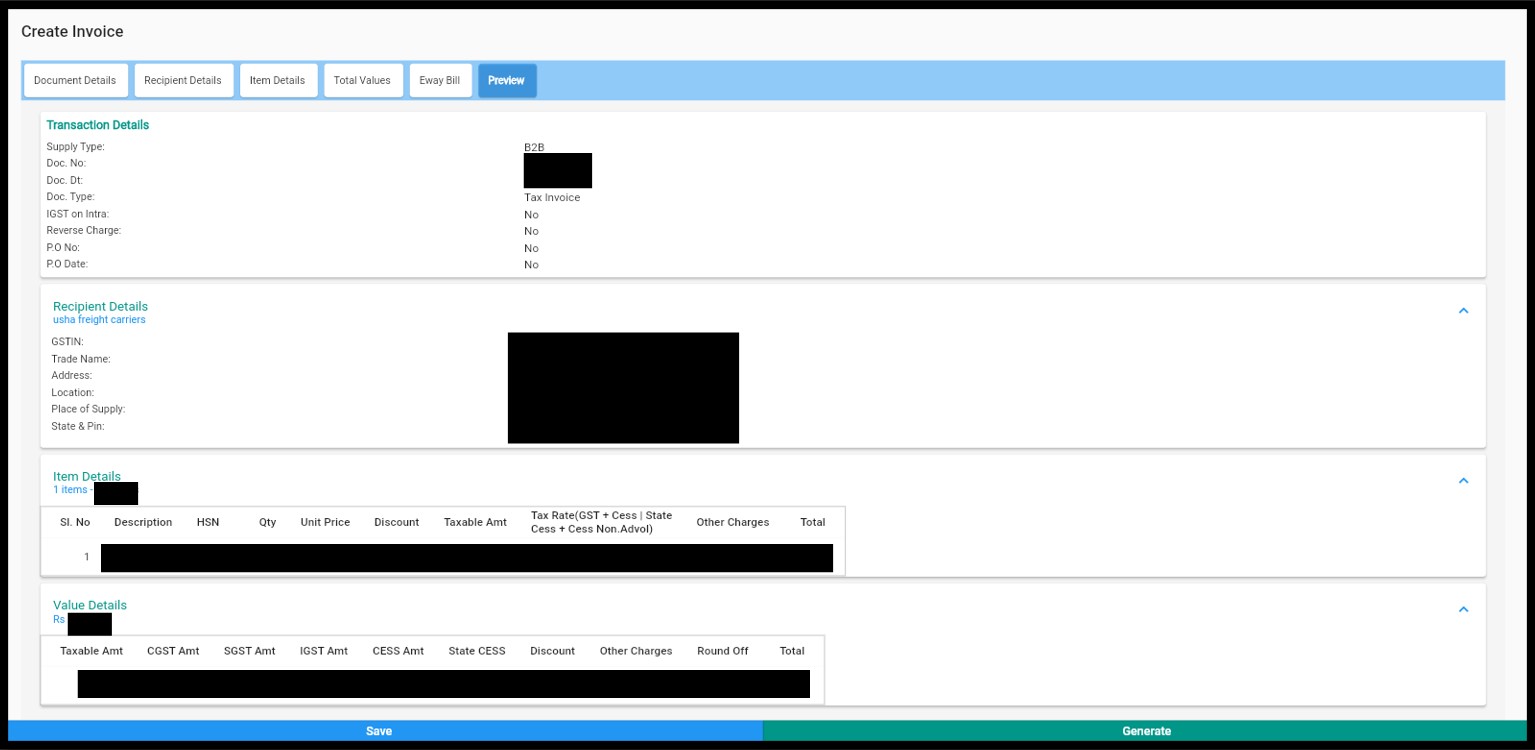
Step 11 – Preview of the details entered by you will be visible on one screen in a summarised manner if you find all the details correctly you may click on “Generate” to generate the e-invoice. Alternatively “save” it to issue it later. If there is any mistake in the details entered one can go back to any tab and make the changes required and then generate the e-invoice.
Related Posts

She can be contacted at info.financepost@gmail.com
- 50th GST Council Meeting - 11/07/2023
- GST Compliance Calendar of October 2023 - 01/04/2023
- GST sections amended in Finance Act 2023 - 27/03/2023
Disclaimer: The above content is for general info purpose only and does not constitute professional advice. The author/ website will not be liable for any inaccurate / incomplete information and any reliance you place on the content is strictly at your risk.
Follow us on Social Media by clicking below
Follow @financepost_in
Thank you for the detailed write up.
Glad it was helpful.
Website is not working
Even we have experienced, GePP portal being down quite a few times. You may raise a grievance on the GST portal and share the ticket number with the GST tech twitter handle. GST helpdesk and the Twitter handle are super fast in addressing the concerns. Hope that helps.
How to change doc. No.
You can only cancel an e invoice and reissue a new e invoice with a new document number. There is no option of changinf the document number.