
Last updated on July 24th, 2022 at 08:04 pm
How to register for Income tax e-filing?
It is mandatory for all citizens to file their income tax returns in prescribed ITR forms once during the year on or before the prescribed due date. The CBDT has also made it compulsory to file the returns electronically except for
- Super senior citizens, i.e. 80 years or above
- Individual or HUF having income less than Rs. 5,00,000/- and there is no claim for refund in the return of income
So it makes it necessary for most of the persons to register. The registration process for a new taxpayer is really simple and easy. You just need to have a few details/things handy to get you through the registration in a couple of minutes.
- Valid PAN
- For contact details
- Email Address
- Mobile Number
- Contact Address
Steps to be followed for New Registration on the Income Tax e-filing website.
Step 1: Go to the e-Filing website of the Income Tax Department (https://incometaxindiaefiling.gov.in)
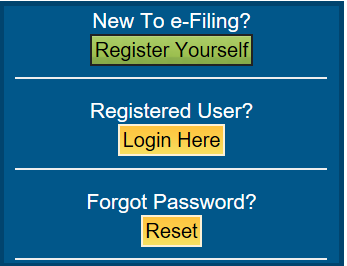
Step 2: On the right-hand side of the home page you there is an option like New To e-Filing? “Register yourself”. When you click there a new page for registration will open.
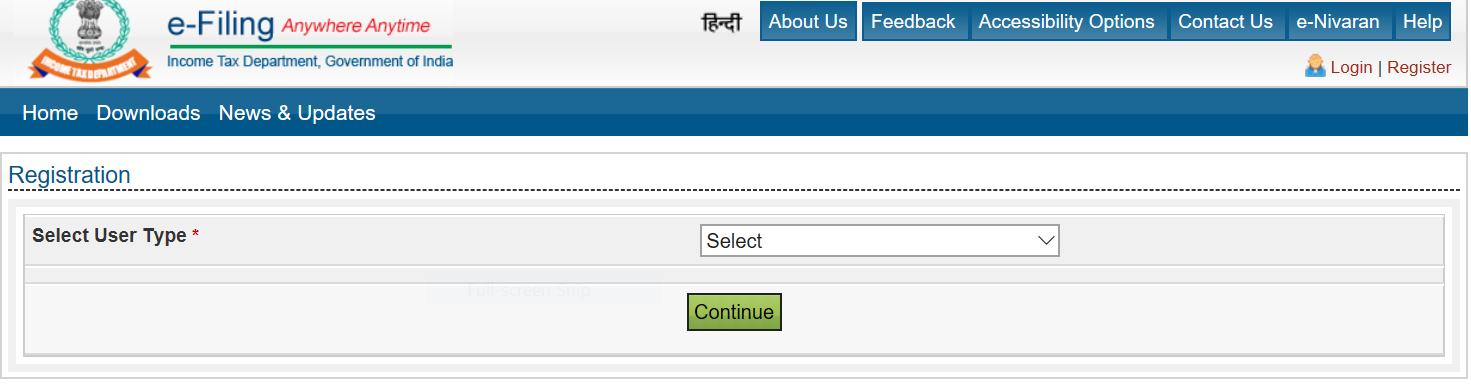
Step 3: Then you have to select the “User Type” from the drop down list. Following are the options in the list taxpayer can choose from :-
- Individual
- HUF
- Other than Individual/HUF (you need to further select the “sub-user type” from the following)
- Company
- Body of Individuals
- Local Authority
- Firm
- Trust
- Association of persons
- Artificial Judicial Person
- Government
- External Agency
- Chartered Accountants
- Tax Deductor & Tax Collector
- Third-Party Software Utility Developer
and then click on the “Continue” button.
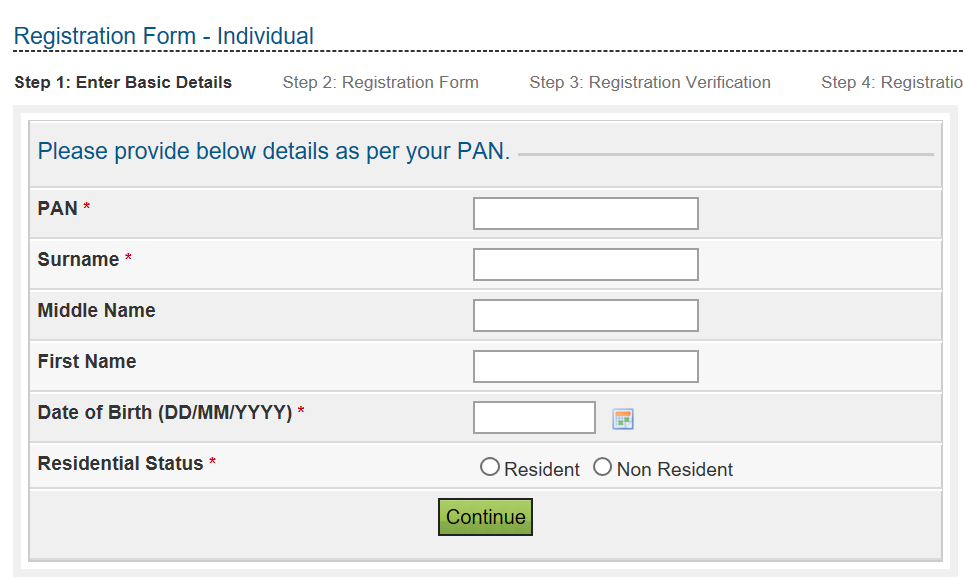
Step 4: Based on your selection of user type it will ask for basic details like
- PAN (this will be your User ID for the e-Filing website)
- Name (First Name, Middle name, Surname or name of organization)
- Date of Birth /Date of Incorporation
- Residential Status
Step 5: After verifying the basic details furnished by the taxpayer, the e-filing website will redirect to the “registration form” page which requires some mandatory information that mainly relates to the contact details of the taxpayer. The following may be required :
- Principal Contact Details
- Contact/Current Address
- Email (this will be your registered email address for the e-Filing website)
- Mobile/Phone Number (this will be your registered mobile number for the e-Filing website)
Step 6: It will ask to set up a “password” that is strong (this will be used to access the e-Filing website).
Step 7: It would further ask for a few things mentioned below, you have to tick in the box if you want.
- Subscribe to Mailing List (Note: it is not mandatory)
- Enable Alerts, reminder, and notifications (Note: it is not mandatory)
- Enter the “Captcha” in the box ((Note: it is mandatory)
Then the last step clicks on the “Submit” button.
Step-8: After successful validation, the taxpayer will receive the message “Registration successful”.
- A confirmation email along with an activation link will be sent to the registered e-mail address provided above.
- And an SMS along with OTP (One time Password) will be sent to the registered mobile number provided above.
- The taxpayer needs to activate the account by clicking on the activation link received on mail and further entering the OTP received by SMS on Mobile.
Now, the taxpayer can access the e-Filing website using PAN as login ID and the password set above.
Related Posts

She can be contacted at info.financepost@gmail.com
- 50th GST Council Meeting - 11/07/2023
- GST Compliance Calendar of October 2023 - 01/04/2023
- GST sections amended in Finance Act 2023 - 27/03/2023
Disclaimer: The above content is for general info purpose only and does not constitute professional advice. The author/ website will not be liable for any inaccurate / incomplete information and any reliance you place on the content is strictly at your risk.
Follow us on Social Media by clicking below
Follow @financepost_in

Be the first to comment